本文共 9998 字,大约阅读时间需要 33 分钟。
概述
最近在做一个Android App,需要从一个Django部署的服务器上读取用户的个人信息。拟使用OAuth2作为授权的方案,简单搜索之后发现Django有一个oauth toolkit的项目,于是就使用了oauth toolkit。在Android系统上,GET和POST等网络操作都交给了Retrofit来完成。这个blog就简单描述一下server side, client side的实现方案,最后给出一个实例。
Authorization server
在OAuth2 的体系中,需要有一个authorization server,用于注册App、用户登录验证、用户授权和access token的分发。我的这个authorization serve调试时即为本机,后端运行的是Django,安装了oauth toolkit,前期也进行了简单调试。为了完成当前的需求,在authorization server上做了几个主要的调整。
(1)需要使用Django自己的User model。
在学习django oauth toolkit时发现,默认情况下oauth toolkit使用Django默认的User model。我目前开发的项目使用的是自定义的User model,之前也尝试了将Django的admin系统配置成custom user model但是最终还是没有成功。目前使用的方案是在custom user model中做一个foreign key,索引到Django自己的User model。
(2)设置上添加本地ip作为allowed server。
为了Android studio的ADV可以与本机的服务器通讯,需要使用本机在局域网中的实际ip地址。配置Django项目的settings.py文件,将本机当前的局域网ip地址加入到ALLOWED_HOSTS里。
(3)修改ALLOWED_REDIRECT_URI_SCHEMES。
为了方便authorization server发回authorization code时Android OS可以直接将Intent发送给我们的App,我们定义redirect uri时最好使用一个custom scheme。一般这个scheme可以是任何有意义的标识,例如公司名,我使用的scheme是huyaoyu,最后redirect uri为huyaoyu://callback。在App的Manifest中添加一个针对这个uri的itent-filter,那么当authorization server返回authorization code时便可以直接得到App的处理。
以上方案的实现,依赖于oauth toolkit支持自定义的scheme。oauth toolkit默认的scheme为http和https。修改默认scheme的方法是在Django的settings.py文件中增加oauth toolkit的配置,具体如下。
OAUTH2_PROVIDER = { 'ALLOWED_REDIRECT_URI_SCHEMES': ['http', 'https', 'huyaoyu'],} 即将ALLOWED_REDIRECT_URI_SCHEMES定义为增加对huyaoyu的支持。参考了
(4)REST framework。
在Django框架下使用了REST框架。具体配置参考。
但需要注意的是,需将所有oauth2_provider.ext改为oauth2_provider.contrib。这个修正参考了
(5)描述各个关键URL。
oauth toolkit提供了一组默认的URL,在当前的项目中通过修改项目总体urls.py来添加相应的url。
urlpatterns = [ url(r'^admin/', admin.site.urls), url(r'^', include(router.urls)), url(r'^o/', include('oauth2_provider.urls', namespace='oauth2_provider')), url(r'^accounts/', include('django.contrib.auth.urls')),] 注意以上urlpatterns变量,省略了其他Django application的引用。并且最后一行是关键,oauth toolkit默认将会引导用户到accounts/地址进行登录,此处需要按照上述形式书写。
注册App。
正确配置oauth toolkit之后,首先一步是在authorization server上注册App。目前本机调试时,Django服务器使用的是本机的8080端口。通过访问http://localhost:8080/o/applications,来进行App的注册。o/applications页面如下图所示(localhost可更换为本机局域网ip为192.168.123.96)。
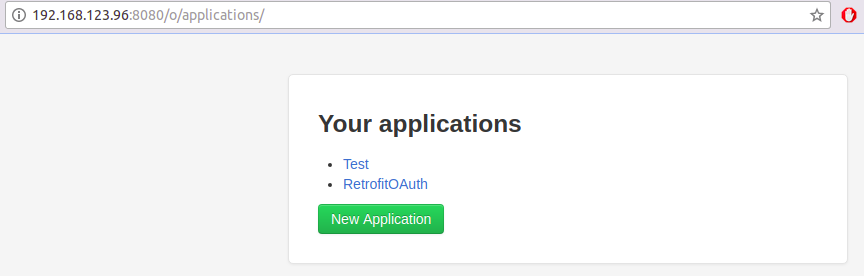
其中RetrofitOAuth是我已经注册好的一个App,也是用于本次调试使用的App。这里RetrofitOAuth只是一个名字,可在真正开发App之前就确定好。第一次登录o/applications页面时需要用用户名和密码登录authorization server。
我们可以点击"New Application"来注册一个新的App。注册时要将redirect uri填写清楚,本工作的redirect uri为huyaoyu://callback。注册好的App信息如下图所示。
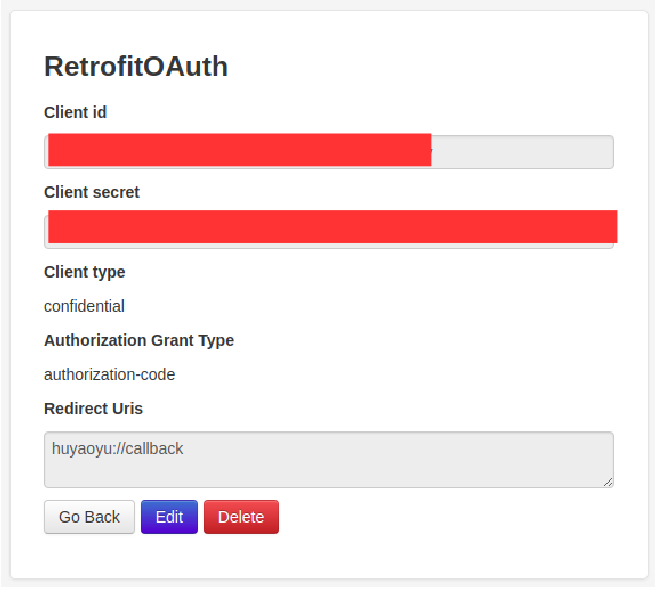
此时将client id,client secret复制出来待用。
Android App
获取access token流程
在Android OS上,App获取access token的流程如下图所示。

(1)App发出浏览authorization server的Intent,目标为获取authorization code。采用GET方法,并提供client ID,redirect uri和response type。URL为(baseurl即为http://192.168.123.96:8080/)
baseurl/o/authorize/?client_id=your_client_id&redirect_uri=huyaoyu://callback&response_type=code
(2)Android OS处理Intent,提示用户需选择一个浏览器处理该Intent。
(3)浏览器通过GET请求authorization server的页面。
(4)authorization server返回响应。
(5)用户登录和授权。
(6)authorization server将redirect uri和authorization code发送给Android OS。
(7)Android OS根据redirect uri的scheme,将Intent发送给App处理。
(8)App onResume(),检测uri的内容中是否正确包含了authorization code。若正确得到了authorization code则利用POST方法,将client ID,client secret和authorization code发送给authorization server,请求返回access token。URL为(baseurl即为http://192.168.123.96:8080/)
baseurl/o/token/
必须要有最后的斜杠
(9)authorization server检测请求的合法性,请求合法时返回access token和refresh token等信息给App。
AccessToken类和Retrofit
关于使用Retrofit通过OAuth2获取GitHub账户信息的实例,可以参考我的。
最终的access token将通过一个Retrofit的Call对象进行获取,这里需要定义一个JAVA class以表达和抽象Call对象获取到的数据。本工作定义了一个AccessToken类,该类的成员变量仅包含oauth toolkit在成功返回access token时的response中的key-value对。这些key包括:access_token, refresh_token, token_type, expires_in和scope。并顺带定义了所有成员变量的Getter函数。
使用Retrofit完成上述的Call动作,需要一个Retrofit client。本工作中定义了一个称为HuyaoyuClient的类。并定义了一个成员函数getAccessToken(),这个函数利用grant type, client ID, client_secret, code (authorization code) 和 redirect uri从authorization server获取信息,最重要的部分是code。这个code即为authorization code。正确获取到authorization code后,需要及时访问authorization server以获取access token否则authorization code 将会过期。
实例
以下通过一个Android App实例进行说明,这个App将有一个极简单的layout。在这个layout上有一个Button,点击该Button后将开始执行前面描述过的“获取access token流程”。成功获取到access token之后,将会通过几个TextView显示获取到的信息。并且App的实时状态也会通过Toast显示。
实例中的部分信息参考了
在app设置(build.gradle)中增加对Retrofit的依赖
dependencies { compile 'com.squareup.retrofit2:retrofit:2.3.0' compile 'com.squareup.retrofit2:converter-gson:2.3.0'} 上述依赖设置省略了其他依赖项。
activity_main.xml
AndroidManifest.xml
AccessToken.java
package com.huyaoyu.retrofitoauth;import com.google.gson.annotations.SerializedName;/** * Created by yaoyu on 3/3/18. */class AccessToken { @SerializedName("access_token") private String accessToken; @SerializedName("refresh_token") private String refreshToken; @SerializedName("token_type") private String tokenType; @SerializedName("expires_in") private String expiresIn; @SerializedName("scope") private String scope; public String getAccessToken() { return accessToken; } public String getRefreshToken() { return refreshToken; } public String getTokenType() { return tokenType; } public String getExpiresIn() { return expiresIn; } public String getScope() { return scope; }} HuyaoyuClient.java
package com.huyaoyu.retrofitoauth;import retrofit2.Call;import retrofit2.http.Field;import retrofit2.http.FormUrlEncoded;import retrofit2.http.Headers;import retrofit2.http.POST;/** * Created by yaoyu on 3/2/18. */public interface HuyaoyuClient { @Headers({ "Content-Type': 'application/x-www-form-urlencoded", "Accept: application/json" }) @POST("o/token/") @FormUrlEncoded Call getAccessToken( @Field("grant_type") String grantType, @Field("client_id") String clientID, @Field("client_secret") String clientSecret, @Field("code") String code, @Field("redirect_uri") String redirectUri );} MainActivity.java
注意authorization server本机调试时不能使用"localhost",而需要使用真实的局域网ip地址,这里本机的局域网ip地址为192.168.123.96。
package com.huyaoyu.retrofitoauth;import android.content.Intent;import android.net.Uri;import android.support.v7.app.AppCompatActivity;import android.os.Bundle;import android.view.View;import android.widget.TextView;import android.widget.Toast;import retrofit2.Call;import retrofit2.Callback;import retrofit2.Response;import retrofit2.Retrofit;import retrofit2.converter.gson.GsonConverterFactory;public class MainActivity extends AppCompatActivity { private String clientId = "Your client ID"; private String clientSecret = "your client secret"; private String redirectUri = "huyaoyu://callback"; private String localHost = "http://192.168.123.96:8080/"; @Override protected void onCreate(Bundle savedInstanceState) { super.onCreate(savedInstanceState); setContentView(R.layout.activity_main); } @Override protected void onResume() { super.onResume(); Uri uri = getIntent().getData(); if (uri != null && uri.toString().startsWith(redirectUri)) { String code = uri.getQueryParameter("code"); Retrofit.Builder builder = new Retrofit.Builder() .baseUrl(localHost) .addConverterFactory(GsonConverterFactory.create()); Retrofit retrofit = builder.build(); HuyaoyuClient client = retrofit.create(HuyaoyuClient.class); Call accessTokenCall = client.getAccessToken("authorization_code", clientId, clientSecret, code, redirectUri); accessTokenCall.enqueue(new Callback () { @Override public void onResponse(Call call, Response response) { String accessToken = response.body().getAccessToken(); TextView textView = findViewById(R.id.textViewAccessToken); textView.setText("Access token: " + accessToken); textView = findViewById(R.id.textViewTokenType); textView.setText("Token type: " + response.body().getTokenType()); textView = findViewById(R.id.textViewExpiresIn); textView.setText("Expires in: " + response.body().getExpiresIn()); textView = findViewById(R.id.textViewRefreshToken); textView.setText("Refresh token: " + response.body().getRefreshToken()); textView = findViewById(R.id.textViewScope); textView.setText("Scope: " + response.body().getScope()); Toast.makeText(MainActivity.this, "Access token obtained!", Toast.LENGTH_SHORT ).show(); } @Override public void onFailure(Call call, Throwable t) { Toast.makeText(MainActivity.this, "No!", Toast.LENGTH_SHORT).show(); } }); Toast.makeText(MainActivity.this, "Yeah!", Toast.LENGTH_SHORT).show(); } else { Toast.makeText(MainActivity.this, "Null!", Toast.LENGTH_SHORT).show(); } } public void onClickGetAccessToken(View view) { Intent intent = new Intent(Intent.ACTION_VIEW, Uri.parse( localHost + "o/authorize" + "?response_type=code&client_id=" + clientId + "&redirect_uri=" + redirectUri )); startActivity(intent); }} 调试
编译环境选取的是Android API24,并虚拟了一个Android 7.0 带有Play Store的虚拟机。虚拟机上运行Chrome浏览器。
调试开始后进入App,点击Button,弹出Chrome,提示登录一个有效注册于authorization server上的用户。登录后将会看到如下画面。
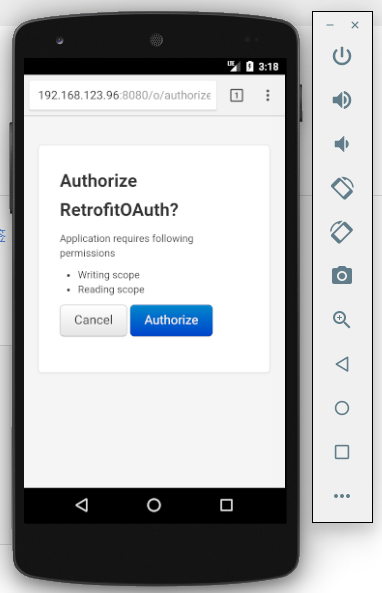
点击“Authorize”以向App发送authorization code。之后无需用户再干预,App将自动获取access token。成功获取access token后将看到如下画面。
